はい、 kotlinシリーズ 今回はいよいよSpring Bootと合わせてみて DBのデータをViewに表示するまでを やってみました。
この記事を書くにあたり以下のリンクを 大変参考にさせて頂きました。
a fledgling 駆け出しが駆け出してみる Kotlin+SpringBootでWebアプリを作ってみる その1
http://kissybnts.hatenablog.com/entry/2016/03/29/002331
構成
構成は以下のような形です。
言語 : Kotlin フレームワーク : Spring Boot テンプレートエンジン : Thymeleaf DB : MySQL ビルドツール: Gradle
では、まずは build.gradle から
build.gradle
buildscript {
    ext {
        springBootVersion = '1.5.1.RELEASE'
        ext.kotlin_version = '1.0.5'
        ext.kotlinx_html_version = '0.5.12'
    }
    repositories {
        jcenter()
        mavenCentral()
        maven { setUrl("http://dl.bintray.com/kotlin/kotlin-eap-1.1") }
    }
    dependencies {
        classpath("org.springframework.boot:spring-boot-gradle-plugin:${springBootVersion}")
        classpath("org.springframework:springloaded:1.2.4.RELEASE")
        classpath "org.jetbrains.kotlin:kotlin-gradle-plugin:$kotlin_version"
    }
}

apply plugin: 'java'
apply plugin: 'kotlin'
apply plugin: 'eclipse'
apply plugin: 'org.springframework.boot'

jar {
    baseName = 'kotlin-web-app-sample'

    version = '0.0.1-SNAPSHOT'
}

repositories {
    jcenter()
    mavenCentral()
}


dependencies {
    compile "org.jetbrains.kotlin:kotlin-stdlib:$kotlin_version"
    compile("org.jetbrains.kotlin:kotlin-reflect:$kotlin_version")
    compile('org.springframework.boot:spring-boot-starter')
    compile('org.springframework.boot:spring-boot-starter-web')
    compile "org.springframework.boot:spring-boot-starter-thymeleaf:${springBootVersion}"
    compile('org.springframework.boot:spring-boot-starter-data-jpa')
    compile 'mysql:mysql-connector-java:5.1.6'
    testCompile('org.springframework.boot:spring-boot-starter-test')
    testCompile 'io.kotlintest:kotlintest:1.3.6'
}
当初は、 kotlinx.htmlやexposedあたりを使おうかと 画策していたのですが、 習得などWebアプリケーションとして体をなすのに 時間がかかりそうでしたので 上記のような構成になっています。
ディレクトリ構成は以下のようにしてみました。
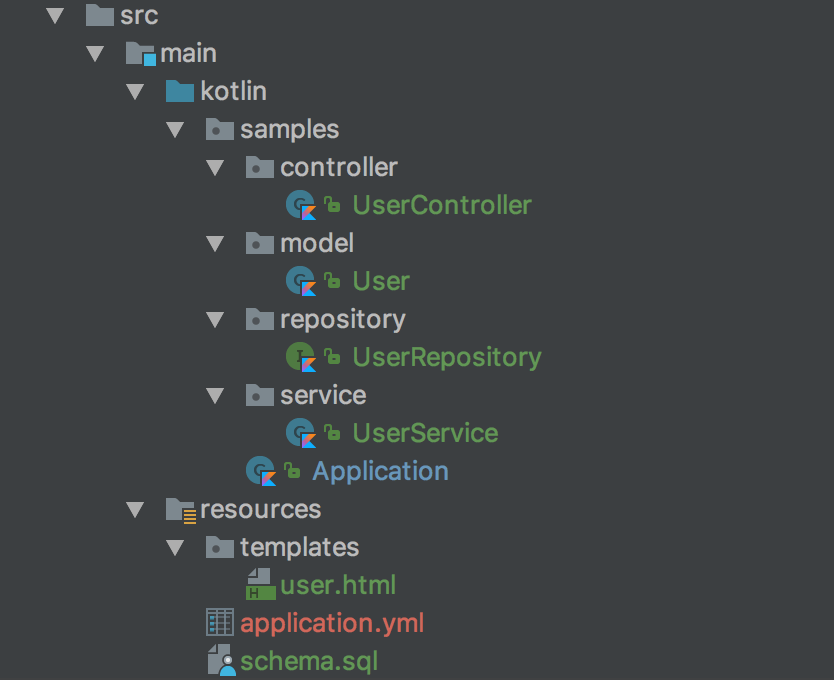
各ソースはgitHubにあげたのでよかったらどうぞ
https://github.com/version-1/kotlin-web-app-sample
起動時に実行される schema.sqlは以下のようにして
create table if  not exists users (
  id int primary key,
  name varchar(255),
  age int,
  sex tinyint
);

delete from users;
insert into users
VALUES( 1 , 'John' , 26 , 1),
( 2 , 'Bob' , 40 , 1),
( 3 , 'Michael' , 20 , 1),
( 4 , 'Mary' , 30 , 0);
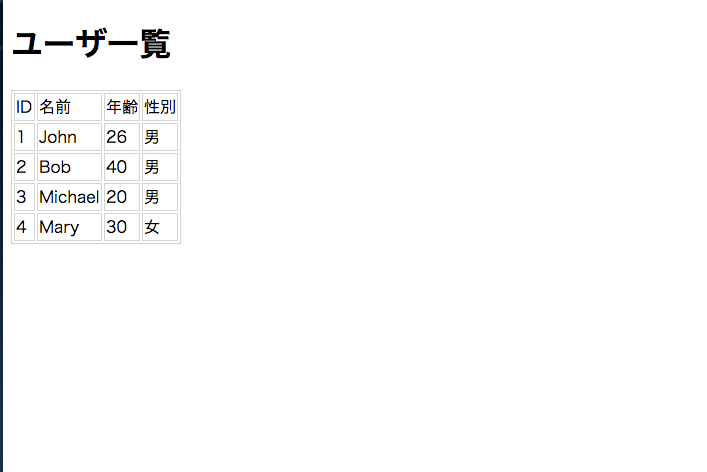
ターミナルから、gradle bootRun としてから http://localhost に接続すると以下のような画面が見れます。
MVCあたりのソースも載せておきます。
UserController.kt
package samples.controller

/**
 * Created by version1 on 2017/02/11.
 */

import org.springframework.beans.factory.annotation.Autowired
import org.springframework.stereotype.Controller
import org.springframework.web.bind.annotation.RequestMapping
import org.springframework.web.servlet.ModelAndView
import samples.service.UserService


@Controller
class UserController @Autowired constructor(private val userService: UserService) {
    @RequestMapping("/")
    fun root(): ModelAndView{
        return users()
    }

    @RequestMapping("/users")
    fun users(): ModelAndView = ModelAndView("/user").apply { addObject("users", userService.findAllUser()) }
}
User.kt
package samples.model

/**
 * Created by version1 on 2017/02/11.
 */

import javax.persistence.Column
import javax.persistence.Entity
import javax.persistence.GeneratedValue
import javax.persistence.Id
import javax.persistence.Table

/**
 * userテーブルのEntity.
 * @param id 主キー
 * @param name 名前
 * @param age 年齢
 * @param sex 性別 ( 0・・・ 女  1・・・男)
 */
@Entity
@Table(name = "users")
data class User(@Id @GeneratedValue var id: Int? = 0,
                @Column(nullable = false) var name: String = "",
                @Column var age: Int? = 0,
                @Column(nullable = false) var sex: Int = 0) {
}
UserRepository
package samples.repository

/**
 * Created by version1 on 2017/02/11.
 */


import samples.model.User
import org.springframework.data.jpa.repository.JpaRepository
import org.springframework.stereotype.Repository

/**
 * usersテーブルのRepository.
 */
@Repository
interface UserRepository : JpaRepository<User, Long> {
}
UserService
package samples.service

/**
 * Created by version1 on 2017/02/11.
 */

import org.springframework.beans.factory.annotation.Autowired
import org.springframework.stereotype.Service
import samples.model.User
import samples.repository.UserRepository

/**
 * DBからのデータ取得と加工を行う.
 */
@Service
open class UserService @Autowired constructor(private val userRepository: UserRepository) {

    /**
     * 全ユーザリストの取得
     * @return ユーザリスト
     */
    fun findAllUser(): MutableList = userRepository.findAll()
}
今回学んだこと
Springの経験がある方はなんてことのない ことかもしれませんが- Springは起動時にクラスパス内のschema.sqlを実行する。
- データベースなどの接続情報はクラスパス内にapplication.ymlを配置して、それに書く
- Thymeleafは標準で、"classpath:/templates/返却された文字列(あるいはメソッド名).html" をレンダリングする。
これで無事Webアプリの骨組みみたいなものは できたと思うので、 これを自分が作りたいものに合わせて 変えていければいいですね^^ 次回は、Kotlinでテストコードを書いてみたいです!! 以上です。
テストコードの記事はまだ書いていませんが。。。 他にもKoltinの記事追加しました。 ご興味あればどうぞ^^
・Kotlin + Spring Boot で Web APIを作成してみる。 その①
・Kotlin + Spring Boot でログイン認証を実装


